Connecting the workstation and the Follett Falcon
To allow your workstation (PCs running Windows® XP or earlier) and the Follett Falcon to communicate, you'll need to create a connection between the two using the Microsoft ActiveSync® software.
You first need to connect the Follett Falcon to the workstation and install ActiveSync.
You can then connect the Follett Falcon to Destiny using either a USB or a wireless connection.
Connecting the Falcon to the Workstation
Included in the packaging with the Follett Falcon is a USB cable to connect the Follett Falcon to the USB port on your workstation.
- Plug the USB connector into one of the USB ports of your workstation.
- Plug the other end into the connection at the base of the Follett Falcon.
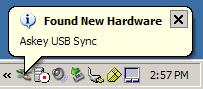
Once you connect the Falcon to your workstation, Windows automatically installs drivers for it.
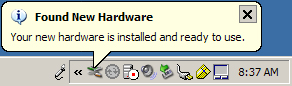
When you see the information, “Your hardware is installed and ready to use", the connection is complete. You'll now need to install Microsoft ActiveSync.
Installing the ActiveSync software
- Insert the CD labeled “Microsoft ActiveSync and Remote Display Control” that was included with your Follett Falcon, or download ActiveSync from the Microsoft website.
http://www.microsoft.com/windowsmobile/activesync/activesync42.mspx
- Double-Click the MSASYNC.EXE file on the CD.
- To install, select or enter the requested information, and click Next or Finish on each step.
Creating a “partnership” between the Falcon and your workstation
When the installation (above) completes, the Set up a Partnership wizard opens.
- Select Yes, and then click Next.
- Click "Yes, I want to synchronize with only this computer", and then click Next.
- In the next step, “Select Synchronization Settings”, clear all of the check boxes, and then click Next.
- Click Finish.
Your Falcon is now be set up to communicate with your workstation through ActiveSync.
Adjacent to your clock in the system tray is the ActiveSync icon— a circle with arrows inside.
Green indicates that there is an active connection. Grey indicates that there is no connection.

Using a USB connection to connect the Follett Falcon to Destiny
This is probably the easiest and quickest way of getting a connection between your workstation and the Follett Falcon. While it doesn’t show the wireless capabilities of the Follett Falcon with Destiny, the resulting windows and functionality are identical.
- Connect the Follett Falcon to your workstation using the USB cable.
You should hear two tones as Windows connects it.
ActiveSync should open and connect your Falcon. The ActiveSync icon near the clock in the lower right-hand corner of your monitor should turn green.
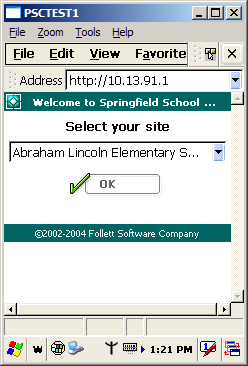
- To start Internet Explorer®, double-tap the Destiny icon on the Falcon desktop.
- Enter the IP address of Destiny in the address field.
- Tap the Enter key on the Follett Falcon keypad.
Using a Wireless Connection to Connect the Falcon to Destiny
- On the Follett Falcon, tap the Start Menu icon, tap Settings, and then tap Network and Dial-up Connections.
- On the Connection window that appears, tap and hold the wireless connection (which is typically something like “WLAGS46B1” but will differ slightly on your unit) and select Properties.
- On the IP Address tab, depending on the configuration of your network or access point, tap either Specify an IP address or Obtain an IP address via DHCP.
If you selected Specify IP Address, enter the appropriate IP address, Subnet Mask, and Default Gateway.

- Tap the OK button in the upper-right corner of the screen.
- Close the Network and Dial-up Connections window by tapping the X in the upper-right corner of the screen.
- Double-tap the wireless networks icon
 on the taskbar at the bottom of the screen.
- Tap the right arrow button near the upper-right corner of the screen.
When the Wireless Information tab appears, tap that tab.
- Tap the Advanced button.
- Make sure that the Automatically connect to check box is selected. The list beneath it should read "All available".
- Tap OK.
- In a few seconds, you’ll see a list of available networks.
Highlight the access point attached to your network and tap the Connect button.
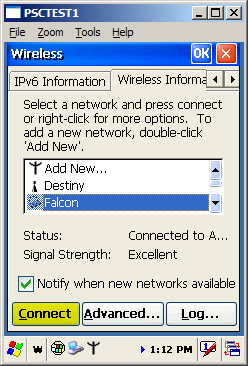
- A window opens showing the network connection information for the access point.
Tap the OK button at the upper-right corner of the screen.
- Within a few seconds, you should see that the access point entry now has the word
(preferred) after it. The status should show Connected to.
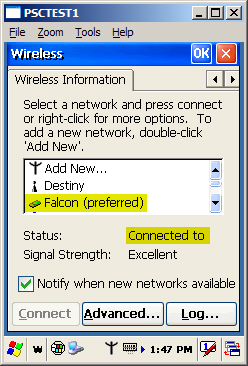
- Tap the OK button in the upper-right corner to close the window.
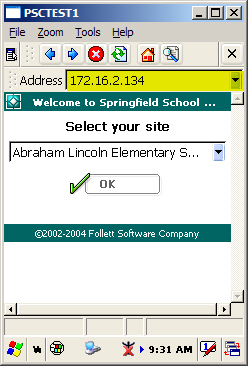
You can test the connection by entering the IP address of Destiny (for example, 127.0.0.1) in Internet Explorer on the Follett Falcon. Mini-Destiny should now appear on your Follett Falcon screen: